Configuring Quicksilver
Connect via usb as for flashing. Press the CONNECT button and select the offered port in the pop up window. Once connected you will be in the Profile tab.
Occasionally on a Windows pc the serial port doesn't show up. If this happens firstly make sure you have power cycled the fc by replugging the usb. If that doesn't work refer to the Troubleshooting Page.
Every time you make a change on a tab remember to click APPLY before leaving the tab. There will always be a confirmation pop up after successfully applying changes.
Quick Setup
-
Name your craft.
-
Check gyro orientation, make sure the model in the configurator moves as expected. (yaw does not show here)
-
Make any uart changes needed to get smartaudio or msp-vtx and serial rx to work.
-
Adjust Dshot, Digital Idle, Turtle Throttle percent and prop direction to suit.
-
Set up rates and expo and load PID profiles. Filter adjustments should be made after a test flight, defaults are safe.
-
If you are using a serial connected rx (uart) it will autodetct the protocol, turn on your transmitter and bind. Save the bind with stick gesture U,U,U on the pitch stick followed by D,D,D.
-
Set Aux channels and flight modes remembering that Quicksilver uses two position switch logic, high or low. Arm is already set on CH5. (Racemode and Horizon mode both require Angle to be active) If no other flight modes are set it will be in Acro/Rate mode only.
-
Set up OSD.
-
Check motor direction and order. (props off)
-
Test fly.
-
Enjoy 👍
Info
Quicksilver calibrates the IMU (gyro) on every boot up of the fc. Connect lipo and place the quad down and still within 15 seconds to get correct calibration.
You can also calibrate at any time by placing the quad level and using the stick gesture D,D,D
More detail is available below on the contents of each tab. There is a tooltip available for many settings, just click on the ?
Profile
Here is where you view and save profile information or load a saved profile. You can also name the craft and see which version of the firmware is on it.
Profiles are saved as .yaml files and can be edited in a code editor.
Target configurations can be uploaded/downloaded here as well, they are also .yaml format (see Runtime targets)
We will supply template profiles for some bnf models here These are available within the configurator and are applied after flashing your target.

Setup
In this tab are the basic hardware settings for the flight controller and anything attatched to uarts such as an RX or VTX.
Select the uart your RX is attached to as well as the VTX Smart Audio connection if applicable. There is an HD VTX option here also to allow HD VTX control over msp.
Some VTX, especially HD ones, will need powered by lipo before connecting to the configurator in order to be detected.
In the case of settings/VTX labels not showing then rebooting with a lipo attatched should cause the VTX to show up.

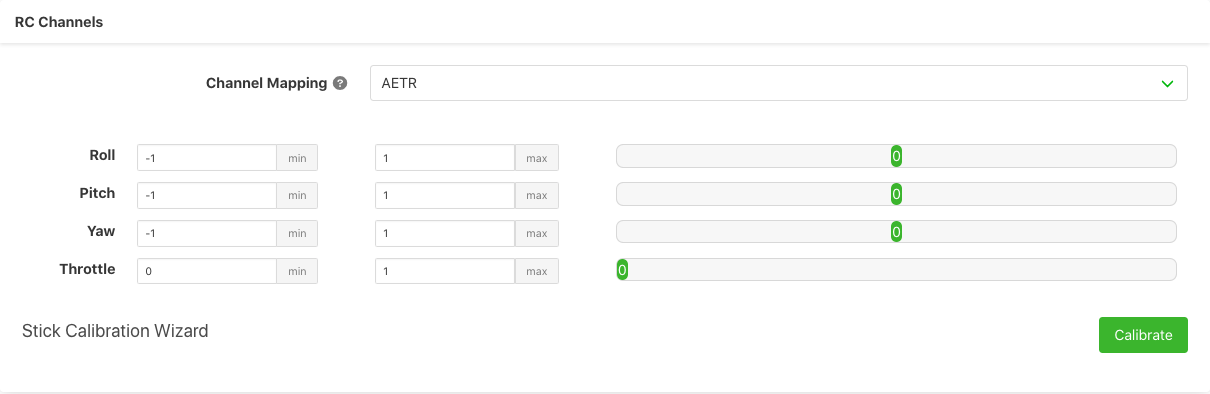
Rates
Rates, PIDs and Filters are all set here.
Stick Rates
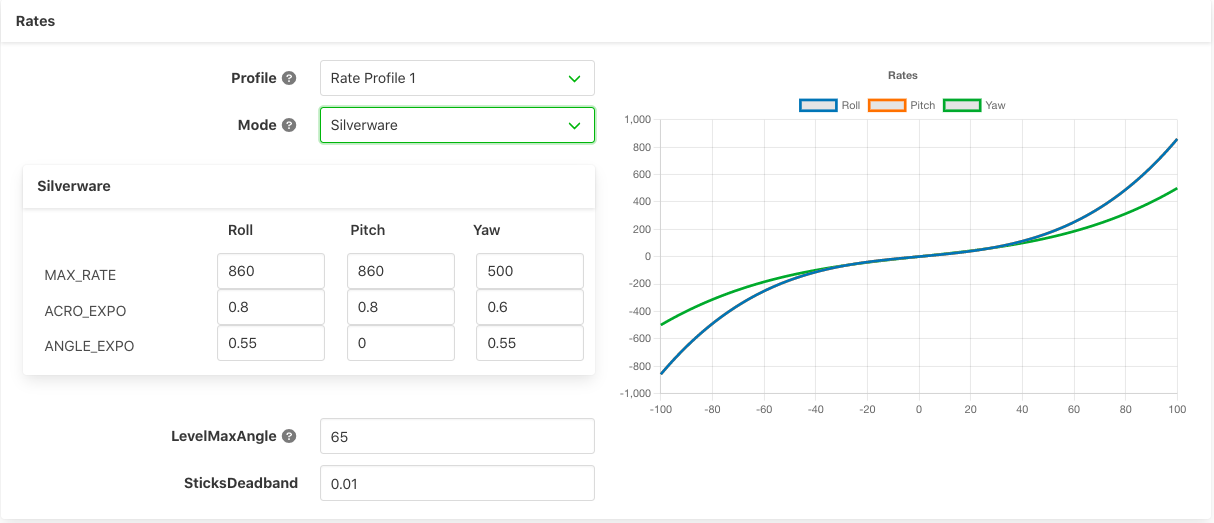 Choose Silverware rates (default) or Betaflight rates or Actual rates.
Two rate profile settings are available.
Choose Silverware rates (default) or Betaflight rates or Actual rates.
Two rate profile settings are available.
Throttle Settings

PID

There are two slots to save a PID profile, choose the preset that most closely matches your craft from the drop down menu and LOAD
Filter
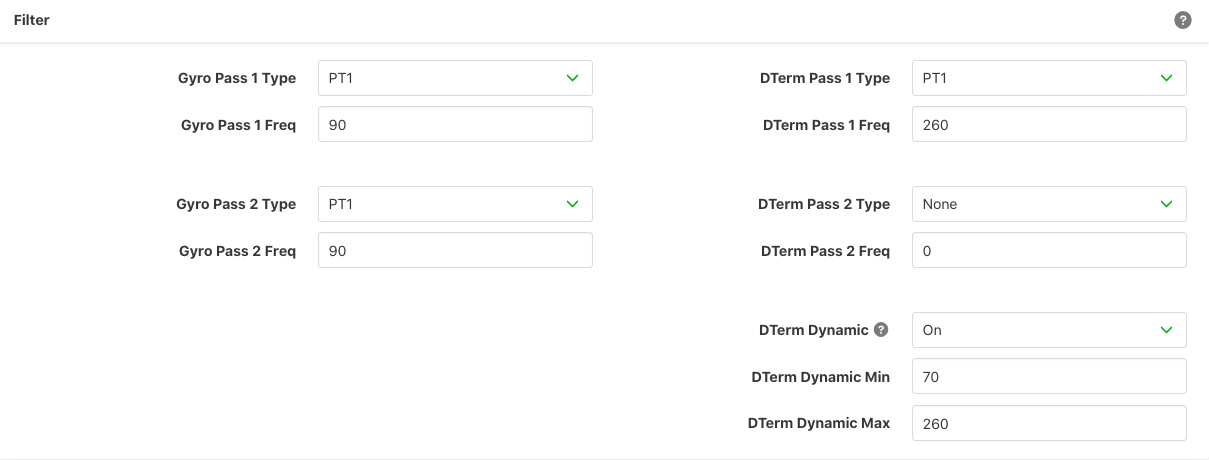 A given filter pass can be disabled by setting the
 Type to None. For example a single gyro filter can be achieved by setting the Gyro Pass 2 Type to None.
Unless otherwise recommended we advise leaving most of the settings here at default values and asking in the Discord server before changing.
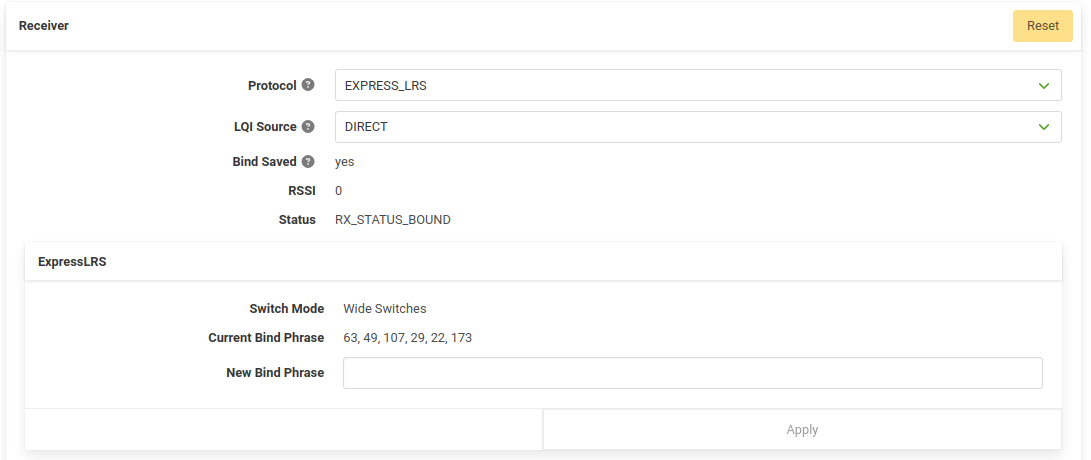
Receiver
As long as a uart is set for serial connected rx or an spi integrated rx is used the firmware will detect the correct protocol.
(Some flight controllers may need a lipo connected to power the rx)
Binding
Expresslrs - If you are using an spi-rx and have a bindphrase enter it here and click save
Redpine/Frsky - Spi-rx will be in bind mode after flashing, press bind on your transmitter and wait until it says RX_STATUS_BOUND in the configurator, then use gesture U,U,U to turn off autobind and follow with gesture D,D,D to save the bind. It will say Bind Saved YES to confirm.

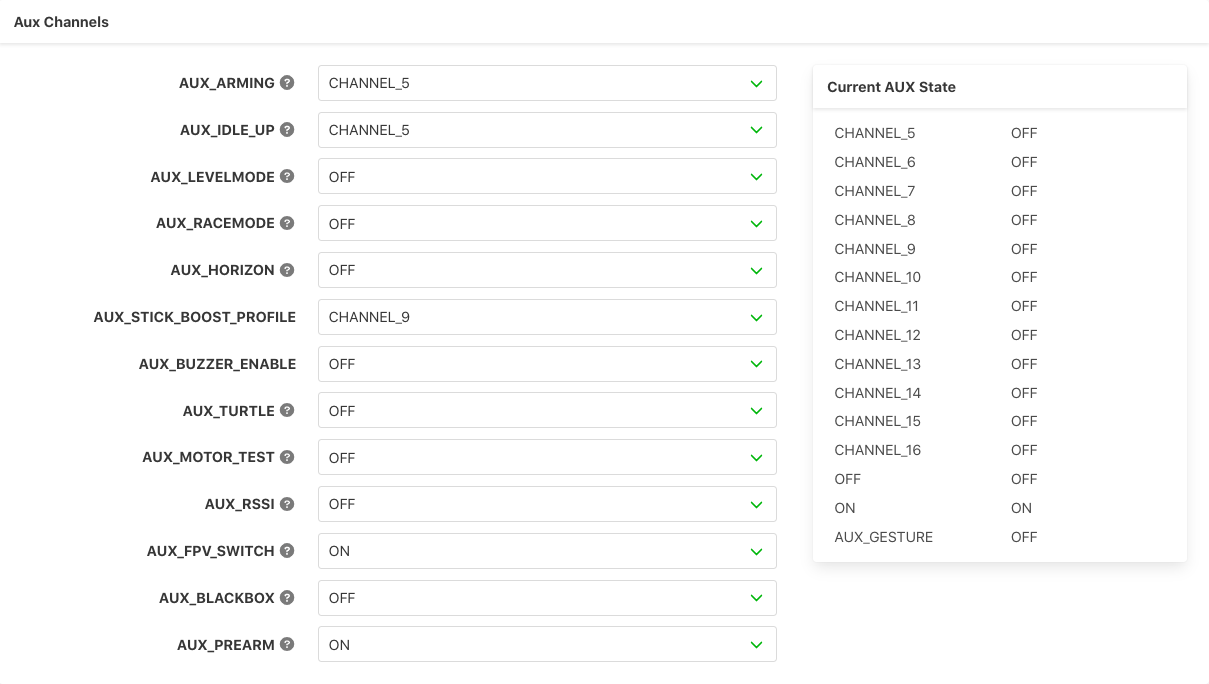
Aux Channels
Aux switches are only two way, high or low in Quicksilver.
You must set an arm switch, Levelmode is required for both Horizon and Racemode to work.
If only Arm is set you will be in Acro/Rate mode.
Info
The **Aux_Prearm** aux channel should be left set to **ON** unless you are using a prearm switch.
To find out about other features operated by Aux channels check Features
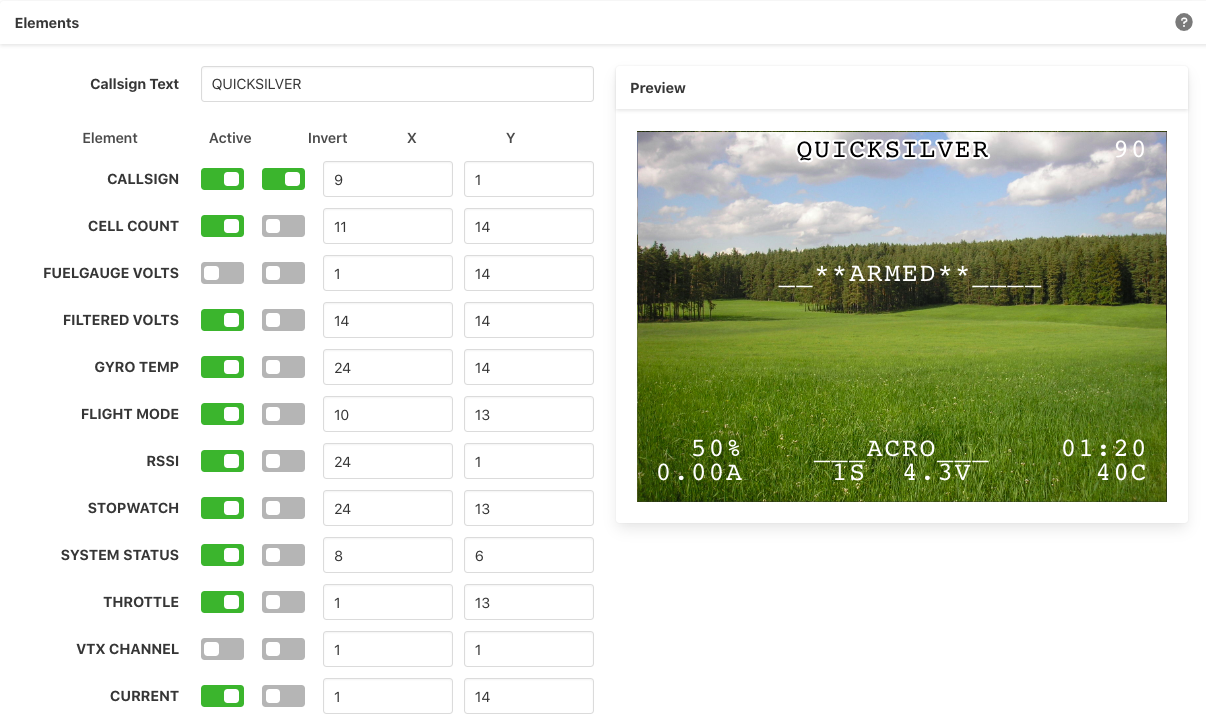
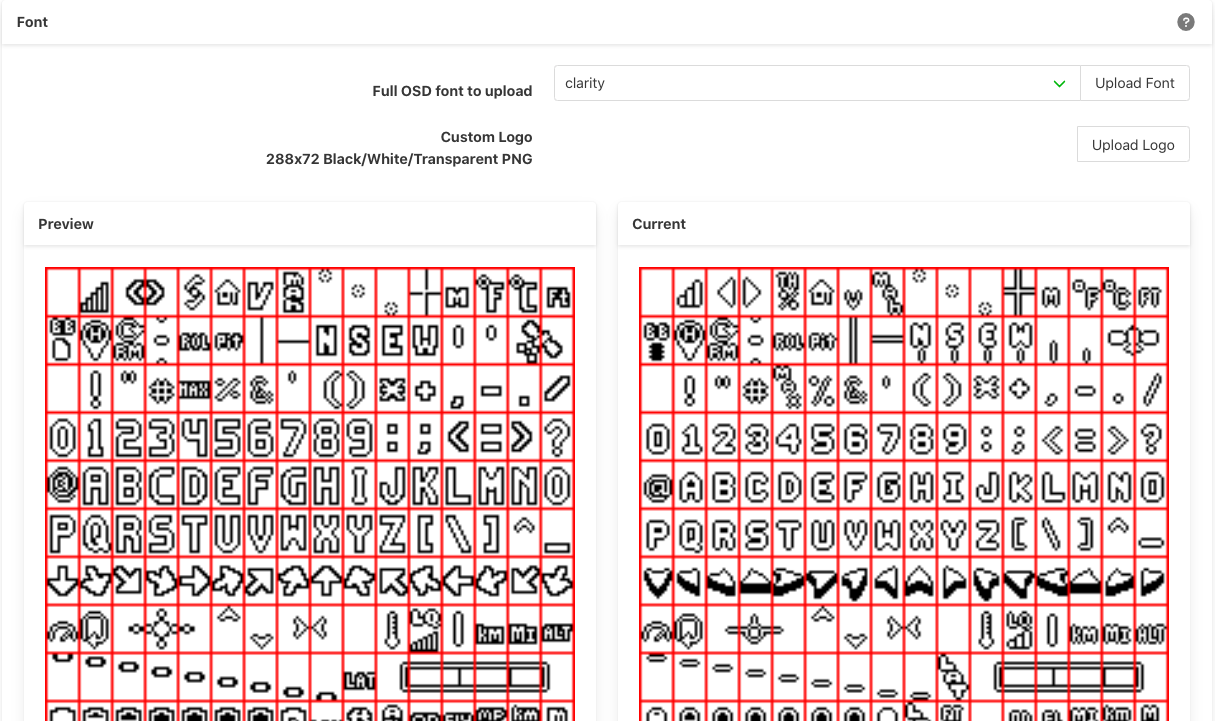
OSD
Select and move various elements and alter callsign.
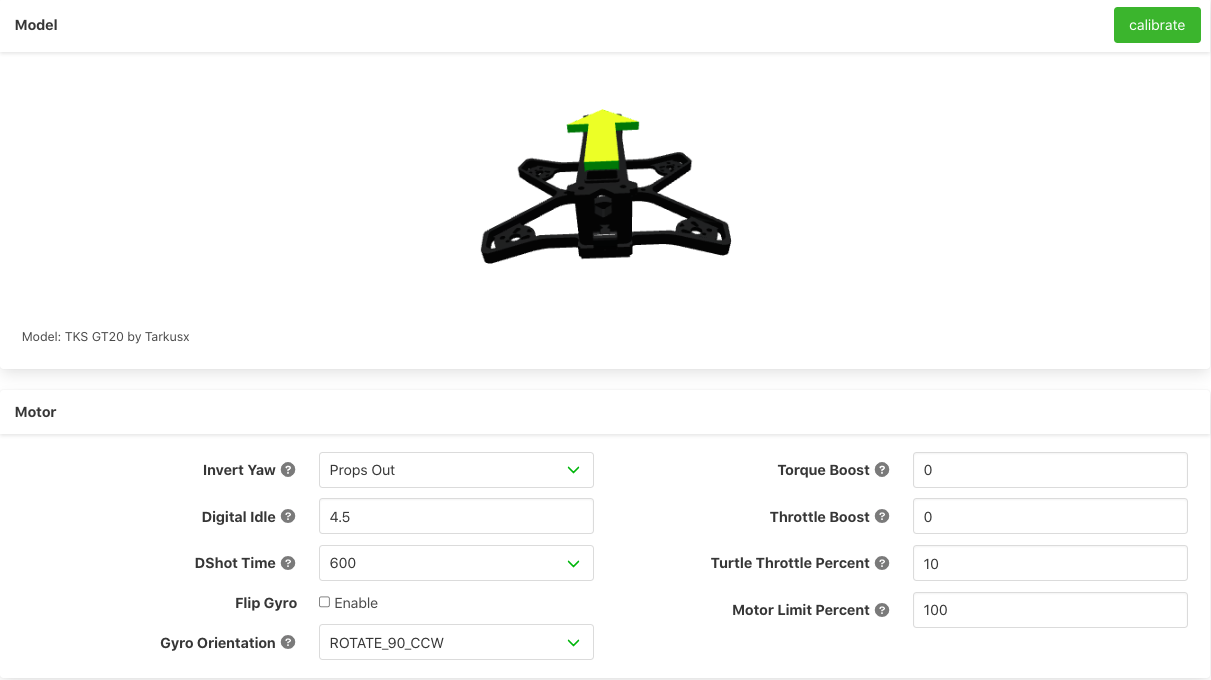
Motor
Warning
REMOVE PROPS BEFORE ACTIVATING ANYTHING ON THIS TAB
A lipo will need to be connected for most of the functions to work.
If your flight controller is in any orientation other than standard you can set the motor pins here. Use the Motor Test function to check position and rotation. If the direction of rotation needs changed the Esc Settings function will allow this.

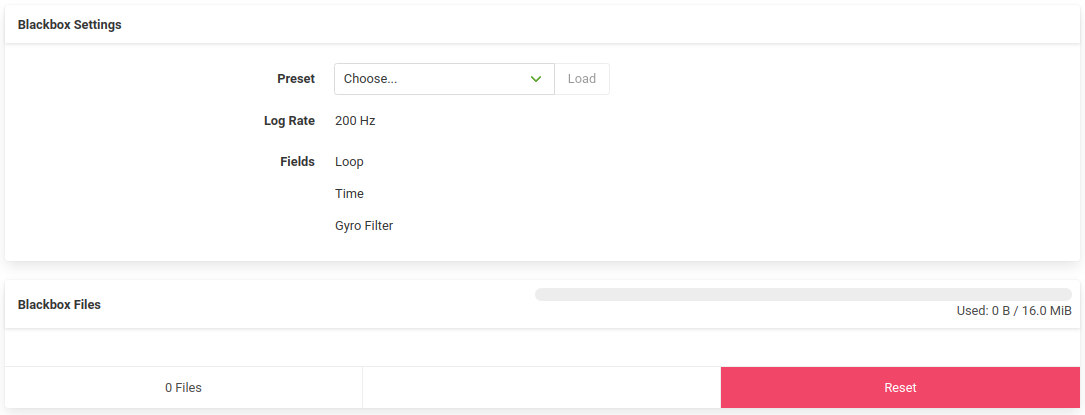
Blackbox
Blackbox recordings can be activated by an AUX switch setup in the Receiver tab and will begin recording on arming when active. Select the sample rate to suit your use case. 1000Hz for analysis or 200Hz for Gyroflow use.
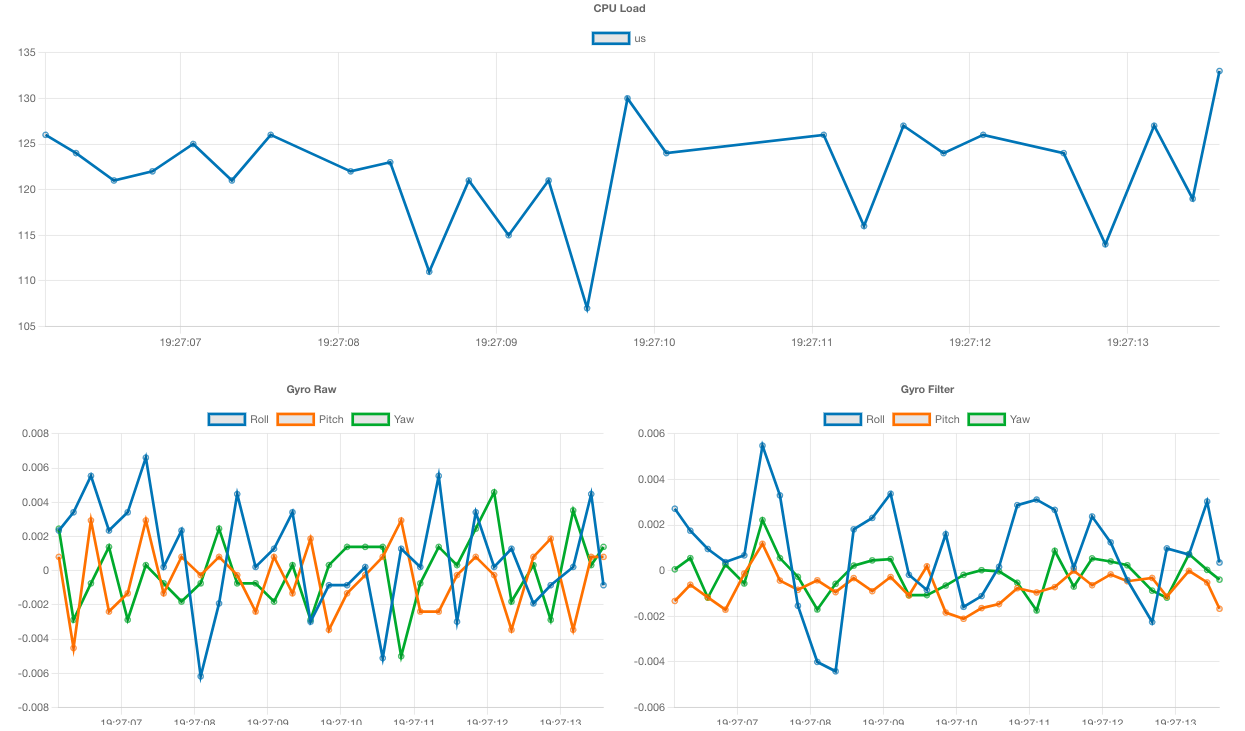
State
Live information in time based graphs of many inputs and outputs from the flight controller.
Use to check correct operation of rc inputs from your TX and to monitor gyro and accelerometer values.